
Didn’t find the answer you were looking for? Refine your search criteria below.
Popular searches: ‘Print Drivers’, ‘Scan to Email’, ‘Lines on Prints’
“Print as Image” Option in Adobe Reader DC
When printing PDF files to your Canon printer, sometimes the result is not what is expected. Missing images, shifted text or sometimes the document doesn’t even print at all. Why does this happen?
This problem occurs with PDF files because they are made up of several “layers”. These layers can confuse you printer and cause it to produce erratic output or not even print the document at all.
To correct this issue, there is an option in Adobe Reader DC called “Print as Image”. This option will “flatten” your document (remove all layers) and convert it to an image before printing.
Here is how to use it:
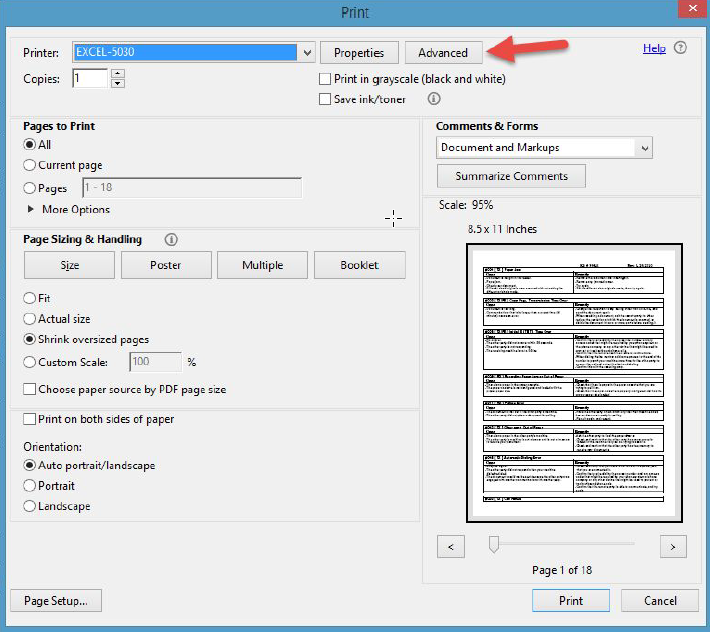
With the PDF file open in Adobe Reader DC, select “File” and then “Print” from the main menu. You will see the Adobe print dialog screen. Next click the “Advanced” button.
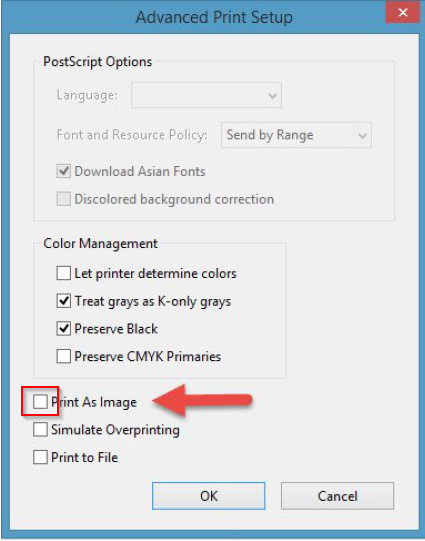
Next select the checkbox called “Print as Image”. This option “flattens” your PDF document and will eliminate the printing issues you are encountering.
We suggest that this setting be done for each of your Canon print drivers to avoid future printing issues.
Making the “Print as Image” setting permanent
In order to make the print as image setting permanent in your Adobe software make sure to follow the steps below:
- Open your PDF file within Adobe Acrobat or Reader DC
- Select Print
- Choose your Canon print driver
- Click “Advanced” button
- Check the “Print as Image” box
- Make sure to hit OK
- Make sure to hit “print” on the next screen
This will set the “Print as Image” to “on” by default in your print driver
Failing to perform options 6 & 7 will not save the “Print as image” option in the “on” state. It is important to remember that this process must be done with each Canon print driver that you use on your system.