
Didn’t find the answer you were looking for? Refine your search criteria below.
Popular searches: ‘Print Drivers’, ‘Scan to Email’, ‘Lines on Prints’
Printing on Heavy Stocks
When printing on heavier stocks, it is important to setup the machine correctly to make sure that your print jobs come out with the great quality that you expect. Follow below for step by step instructions on setting up custom stocks in the Multi Purpose Tray of your photocopier.
DISCLAIMER: Always make sure that the stocks you are using are labelled as “For Laser Printers”. If photo paper made for inkjet printers is used, it can melt in the machine, voiding your service contract!
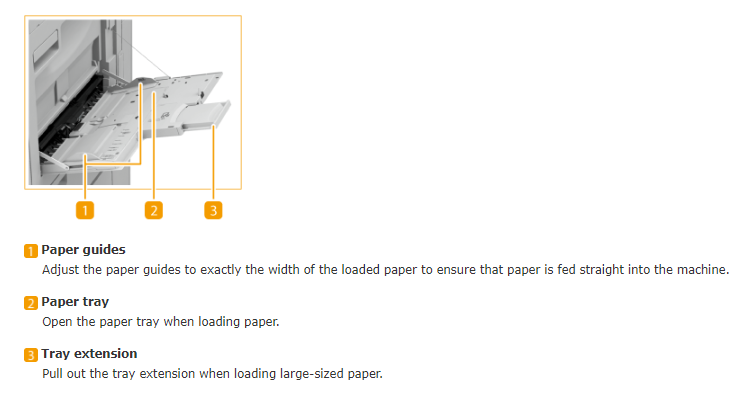
Locating the Multi Purpose Tray:
The Multi Purpose Tray (or, MP Tray) is a fold down tray located on the right hand side of the photocopier. This is where your stocks will be loaded. Please note that stocks are loaded print side down. Once you have placed your paper on the tray, make sure the paper guides are tight and then refer to the screen of the copier.
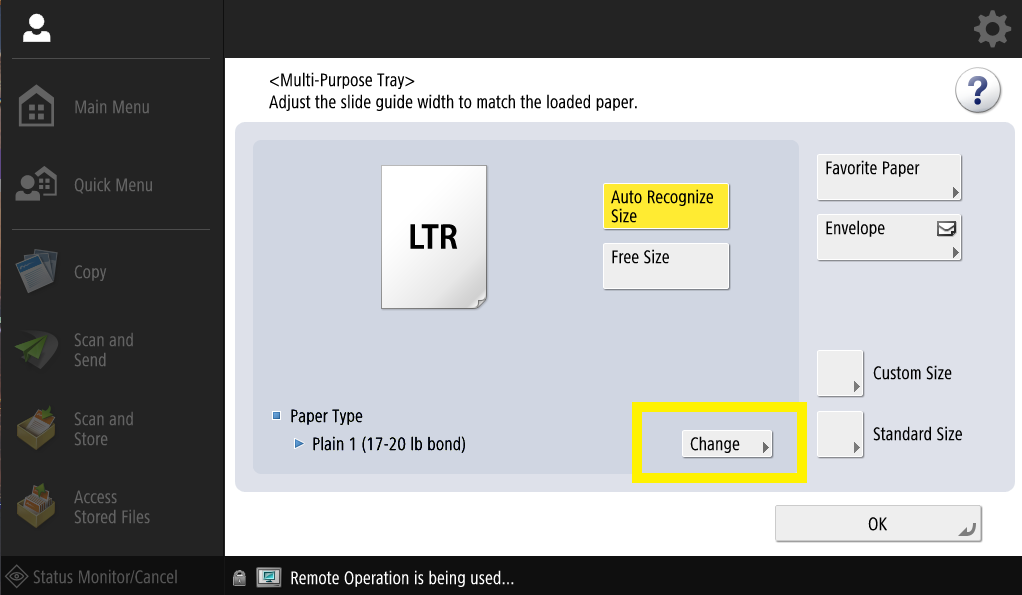
Selecting your stock settings:
Once loaded, the machine will automatically recognize the size of the stock as long as the paper guides are snug to the paper. We will then need to select the weight of the paper. This can be found on the packaging, or by contacting the paper supplier. For best results, you will want to find the GSM (grams per meter squared) weight measurement. In order to change the paper weight, select the “Change” button on the screen (highlighted in yellow in the image to the left).
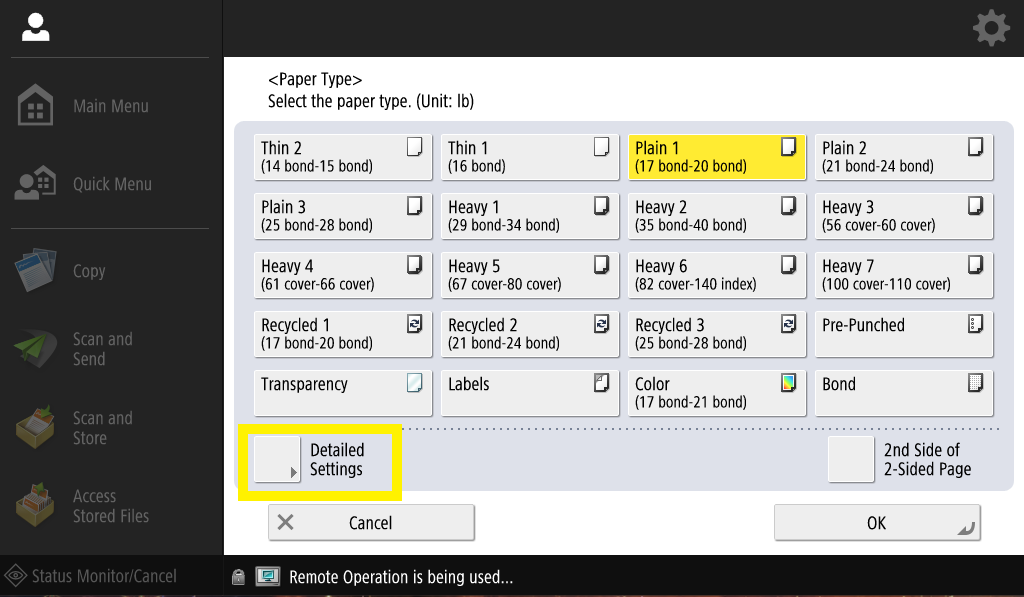
Selecting Paper Weight:
In order to get the closets paper weight possible, you will want to select the “Detailed Settings” button on the screen (highlighted in yellow in the image to the left). This will open a new page, allowing you to pick by GSM.
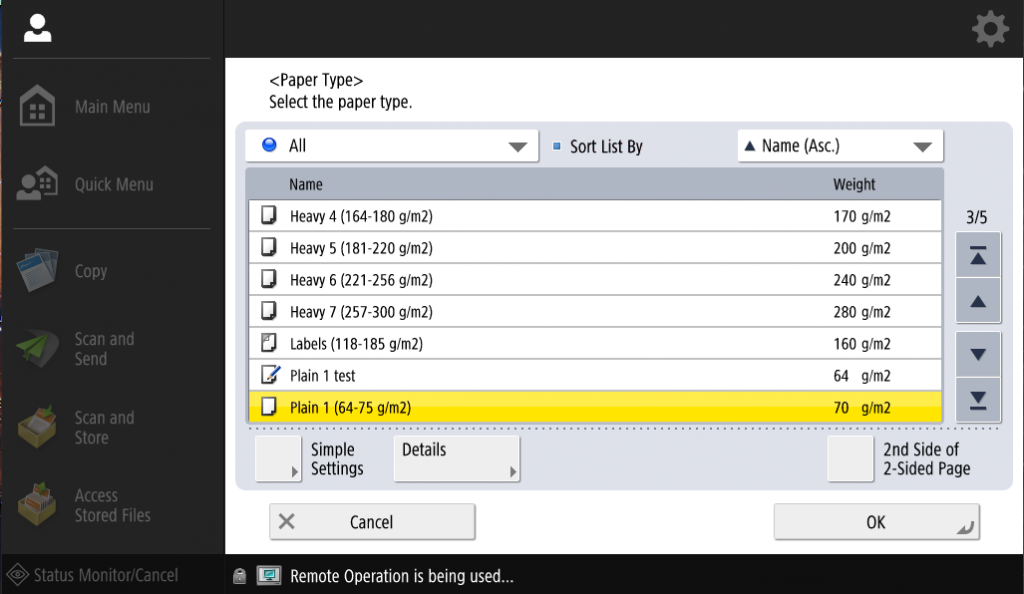
Detailed Paper Type Settings:
In the detailed paper weight settings, select the option that is most relevant to the stock that you have loaded and press the OK key. This will bring you back to the previous screen, where you can then press the OK key one more time to confirm the settings on the machine.
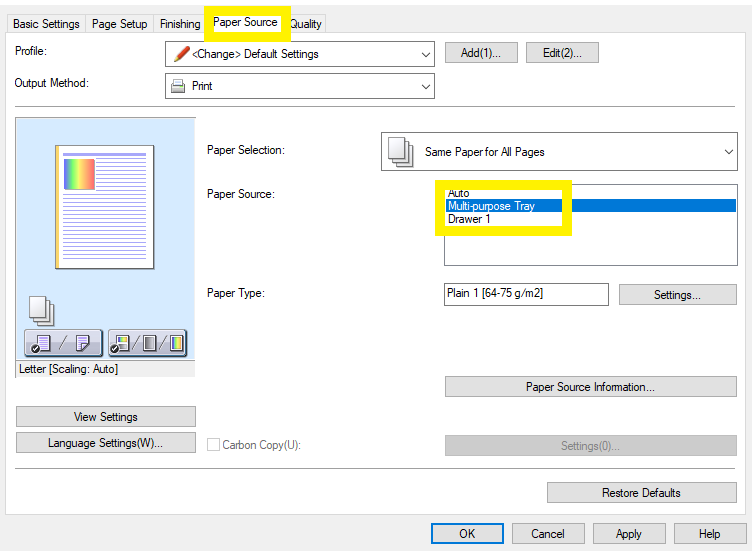
Selecting MP Tray Paper Source:
Now that the stock has been correctly set on the machine, you can now send your print jobs to the copier. You will need to make sure that you select the “Multi-purpose Tray” from the “Paper Source” tab in your driver settings (highlighted in yellow in the image to the left). All that is left to do now is send the print job to the copier!