
Didn’t find the answer you were looking for? Refine your search criteria below.
Popular searches: ‘Print Drivers’, ‘Scan to Email’, ‘Lines on Prints’
Printing on Transparencies
Transparencies are clear sheets of paper used with overhead projectors. When printing on transparencies, it is important that you set the stock settings on the machine correctly and only feed the sheets through the Multi-purpose Tray. Below are the steps to take when printing on transparencies.
DISCLAIMER: Always make sure that you only print on genuine Canon manufactured transparencies. If non genuine transparencies are used they can melt in the machine, resulting in severe damage to the machine not covered by your service contract!
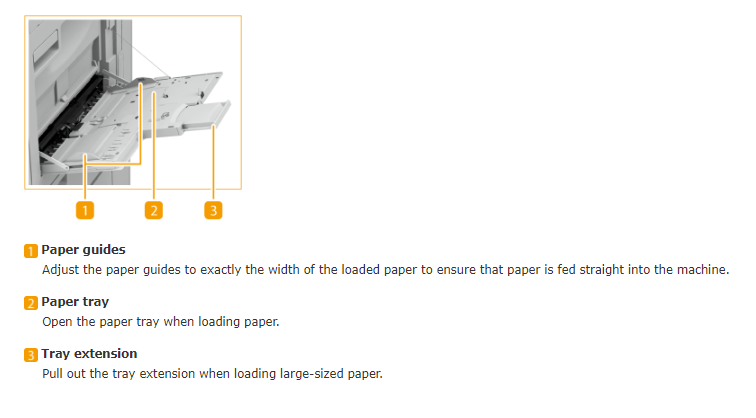
Locating the Multi Purpose Tray:
The Multi Purpose Tray (or, MP Tray) is a fold down tray located on the right hand side of the photocopier. This is where your stocks will be loaded. Please note that stocks are loaded print side down. Once you have placed your paper on the tray, make sure the paper guides are tight and then refer to the screen of the copier.

Selecting your stock settings:
Once loaded, the machine will automatically recognize the size of the stock as long as the paper guides are snug to the paper. We will then need to set the stock type as “Transparencies”. In order to change the paper type, select the “Change” button on the screen (highlighted in yellow in the image to the left).
Selecting Paper Type:
On this screen, you will need to select the paper type loaded in the “MP Tray”. Make sure to select “Transparencies (highlighted in yellow in the image to the left). You can the select the OK button to go back a screen. Select the OK button one more time to confirm your settings.
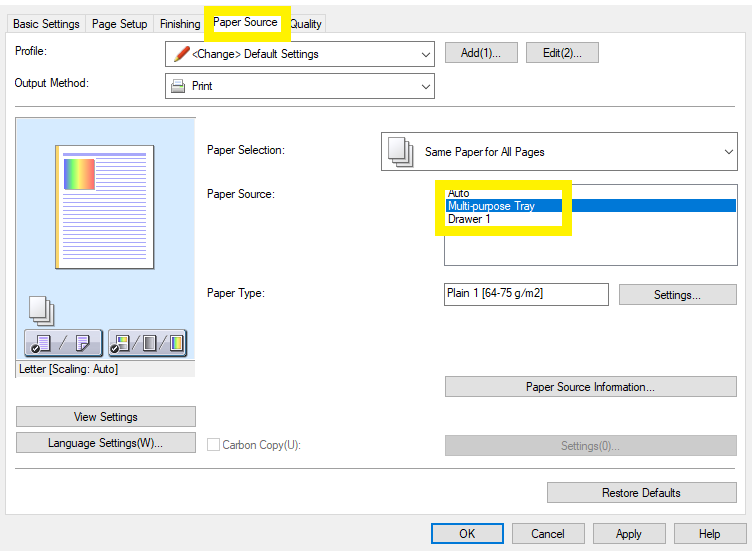
Selecting MP Tray Paper Source:
Now that the stock has been correctly set on the machine, you can now send your print jobs to the copier. You will need to make sure that you select the “Multi-purpose Tray” from the “Paper Source” tab in your driver settings (highlighted in yellow in the image to the left). All that is left to do now is send the print job to the copier!